Summary
This is quick and easy crumble created when I had an abundance of blackberries from the yard this past year. As many folks in my area, I have blackberries growing wild on a portion of my property. Most of the time I consider these as a nuisance since they’re covered with nasty thorns, catch on everything they can, and grow like crazy all over the place. I’ve never actually harvested them before because it never seemed there were enough berries to be worthwhile (and the raccoons tend to tear into them anyway), but this past summer I found that there were enough clumps of berries that after trimming and picking I had several large bowls worth — probably somewhere in the neighborhood of 12-16 quarts of berries. This crumble was a simple way to put some to use and give me something different for dessert!

Ingredients
- 12 ounces blackberries fresh or frozen, about 3 cups
- 6 tablespoons unsalted butter softened
- 2/3 cup brown sugar
- 1/2 cup old fashioned oats
- 1/2 cup white whole wheat flour or all-purpose flour
- 1/4 teaspoon cinnamon
- 1 pinch sea salt
Preparation
- Preheat the oven to 375. Prepare an 8 inch square or 9 inch round pan by lining it with foil. Place the berries in the lined pan.
- Place the butter, sugar, oats, flour, cinnamon, and salt in a medium sized bowl. Stir vigorously until the ingredients have formed into small clumps. At this point, there should be no loose flour or sugar in the bowl and no visible bits of butter.
- Using the back of the fork, compact the mixture firmly into the bowl until it sticks together in one large clump. Then, use the tines of the fork to gently break it into clumps of various sizes- some large, some small. Carefully tip the bowl sideways over the pan of berries and use the fork to scoot the clumps out of the bowl evenly over the top of the berries.
- Place the pan in the oven and bake for 30 minutes, or until the top is golden brown. Let cool until just slightly warm so that the topping can firm up properly.
Results

Summary
Traditional Mexican / New Mexican dish. Can be served as a main dish with finely sliced cabbage, radish, a dollop of sour cream, and warm tortillas. Makes a great side dish with other New-Mexican fare.
One of my personal favorites is a bowl of posole topped with a single soft-fried or sunny-side-up egg and buttered tortilla for breakfast.
Ingredients
- 2 25oz. cans hominy
- 1 15oz. can stewed tomatoes
- 1 white onion, diced fine
- 4-6 large cloves garlic, pressed
- 1 lb. pork loin roast, cubed
- 1 quart chicken stock
- 1/4 cup lemon juice
- 1/4 cup vegetable oil
- 1/2 bunch fresh cilantro, chopped fine
- 1 Tbsp. oregano
- 1 Tbsp. basil
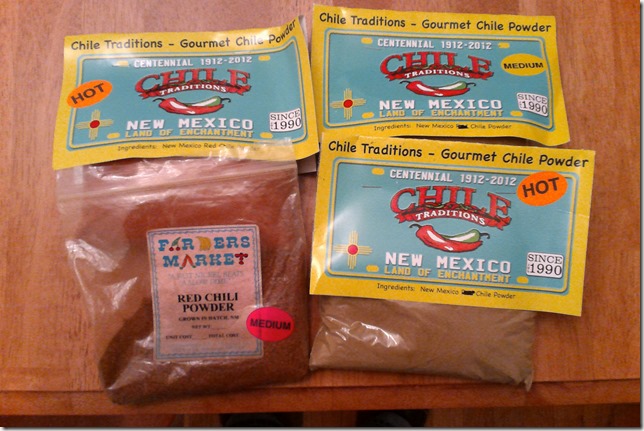
- 4 Tbsp. medium red chile powder
- 1 tsp. salt
Preparation
- Combine lemon oil, cilantro, oregano, basil, 1 Tbsp. of red chile. Blend thoroughly.
- Marinate pork in lemon oil mixture overnight. Drain and lightly rinse.
- In a large skillet, brown pork mixture; ~12-15 minutes
- Drain hominy, tomatoes.
- Combine 1 quarts water, 1 quart chicken stock, browned pork, tomatoes, onion, garlic, hominy, red chile powder, salt, and bring to rolling boil. Reduce heat slightly and continue to boil, covered, 30 minutes.
- Reduce heat to medium and simmer covered, 60-90 minutes. Pork should fall apart to fork, when done.
New! Instant Pot Preparation
- Follow the standard Preparation steps 1 and 2
- Using the Saute setting, brown pork mixture; ~12-15 minutes.
- Drain hominy and tomatoes.
- Add 1 quart water, 1 quart chicken stock, tomatoes, onion, garlic, hominy, red chile powder, and salt to pot.
- Close and seal Instant Pot lid. Cook using Meat/Stew setting, 45 minutes.
Results
Base Microwave Brittle Recipe By: Allrecipes.com
Summary
“Christmas” refers to this utilizing both red and green New Mexico chile. (Insider tip: when asked “red or green?” for your chile preference in a New Mexican restaurant, reply “Christmas” to get both – enchiladas and huevos rancheros both benefit from this treatment!)
This is also “Christmas” brittle to me ‘cause it’s something I typically make around the holidays to bring a little bit of the Southwestern flavor to my home in the Pacific Northwest…
Note that the base of the brittle is the same for both types — all that changes is the type of chile and nuts.
A Note About the Chile
Being somewhat of a New Mexico chile snob, the type really matters to me. I recommend Hatch red and green chile powder, but Chimayo red works well also. The recipes above call for 1-2 Tbsp. of each chile type, with the greater amount used if using medium chile powder, and the lesser if using the hot variety.
Ingredients
| Red Chile Peanut Brittle | Green Chile Pistachio Brittle |
|
|
Preparation
Preparation for both types is identical, just vary the chile and nut variety for each batch.
- Butter a cookie sheet (or apply a light layer of cooking spray), and put in oven at 225°.
- Combine sugar and chile powder, mixing thoroughly in a 2 quart microwave-safe glass bowl or container. Combine mixture with corn syrup.
- Microwave sugar mixture on High, 4 minutes.
- Stir in nuts and microwave on High, 3½ minutes more
- Stir in butter and vanilla, and microwave again, High: 1½ minutes.
- Rapidly stir in baking soda until light and foamy.
- Pour onto warmed cookie sheet and spread thin. Note: if brittle does not spread thin initially, the cookie sheet can be put back into 225° oven to warm and further spread.
- Cool and break into pieces to serve. (I’ll often place the brittle pan into a refrigerator once room temperature to fully cool and harden).
Result
Quick and easy Italian comfort food!
Ingredients
- 2 cups marinara sauce
- 1 box manicotti shells
- 4 cups (32 oz.) Ricotta cheese
- 1 1/2 cup shredded Mozzarella cheese
- 1 1/2 cup grated Parmesan cheese
- 1/4 cup chopped parsley
- 1 tsp. crushed basil
- 1/4 tsp. salt
- 2 Italian sausage
Preparation
- Preheat oven to 375 degrees.
- Bring 3 quarts water to a boil. Cook manicotti shells for 9 minutes; drain and rinse in cold water.
- While cooking shells, break up and sauté Italian sausage in a small skillet until brown.
- Spread a small amount of marinara sauce over bottom of baking dish, roughly 13”x9”.
- In a large mixing bowl, combine ricotta, mozzarella, Parmesan cheese, parsley, basil, and salt, mixing thoroughly. Spoon filling into a pastry bag and fill cooked shells.
- Place filled shells in baking dish. Cover with remaining marinara sauce. Sprinkle cooked sausage over manicotti.
- Cover tightly and bake for 30-35 minutes.
Result
Just recently returned from New Mexico and was able to stock on Hatch green chile on the way out of town. On the way home tonight I knew I needed to get groceries for dinner and it hit me: Green Chile Chicken Soup!
This is attempt #1.
Ingredients
- 1 large or 2 small chicken breasts
- 1/2 cup butter
- 3/4 cup flour
- 1/2 white onion
- 1 potato
- 2 cups milk
- 4 cups chicken broth
- 1 cups chopped, roasted hot Hatch green chile
- 2 cloves garlic
- Salt & Pepper, to taste
Preparation
- Grill the chicken breast(s) until done, and set aside to cool.
- Chop onion and potato fine.
- Peel and press garlic.
- Cut cooled chicken breast(s) into small pieces.
- In a large pot, melt butter and add flour, whipping to a smooth roux. Immediately add milk and broth to roux, mixing until smooth. Bring base just to a boil and add garlic, potato, onion, green chile, and chicken.
- Reduce heat and simmer covered for 30 minutes, stirring occasionally.
Serve with your favorite tortillas or tortilla chips. Can be topped with a dollop of sour cream and/or finely grated cheddar cheese.
Result
Footnote: This really requires real Hatch green chile – don’t make it with anything else!
Summary
I love a good meatball, so I continue tweak and experiment with a few patterns, and this one is just a brain-dump of the latest iteration which turned out well. The red sauce can be much more complex than that here — this capture is mainly focused on the ‘balls.
Ingredients
- 16oz ground lamb
- 12oz ground pork
- 4 cloves pressed fresh garlic
- 6 tbsp panko crumbs
- 1 tbsp oregano
- ~½ cup milk (just enough to cover crumbs)
- Flour
- Salt and pepper, to taste
- 2-3 cups tomato sauce
- 8-12oz egg noodles or angel hair pasta
Preparation
- Place crumbs in bowl and add just enough milk to cover. Set aside
- Combine pork, lamb, and garlic, thoroughly mixing with hands.
- Add spices and bread crumbs to meat, again mixing thoroughly.
- Form meat mixture into 1″ meatballs, rolling in flour until lightly coated.
- Brown meatballs in butter over medium heat.
- While browning meatballs, bring water for pasta to boil.
- Preheat oven to 350 degrees. Place meatballs in small casserole dish, covering with tomato sauce.
- Bake meatballs for 20 minutes, turning occasionally.
- During final 10 minutes of cooking, add pasta to water and cook al dente.
Serve meatballs in sauce over pasta.
Result
<TBP>
Ingredients
- 1/2 lb Ground lamb
- 1/8 tsp ground cayenne red pepper
- 1 tsp summer savory
- 1/2 tsp sage
- 1/2 tsp onion powder
- 1 tsp garlic powder
- Flour
- 2 cups tomato sauce +1 cup water
- 8-12 oz egg noodles
Preparation
- Combine spices and lamb.
- Form meat mixture into 1″ meatballs, rolling in flour until lightly coated.
- Brown meatballs in butter over medium heat.
- Preheat oven to 300 degrees. Place meatballs in small casserole dish, cover with tomato sauce.
- Bake meatballs for 40 minutes, turning occasionally.
- During final 20 minutes of cooking, bring water to a boil and cook egg noodles, boiling 10 minutes until done.
Serve meatballs in sauce over egg noodles.
Result
Stolen from my Mom over the holidays, this version of chicken picatta is a delicious work in progress. I’ll update the ingredients with more specific amount guidance as I figure it out…
Ingredients
- 1-2 chicken breasts
- 1/4 cup flour / chicken breast
- 1/4 tsp salt / chicken breast
- 1/4 tsp pepper / chicken breast
- 2 Tbsp olive oil
- Angel hair pasta, 1-2 nests
Sauce: Wine
- Tbsp butter
- 1/4 cup white wine
- 1/8 cup lemon juice
- 2 tsp capers
Alternate Sauce: Lemon Cream
- 1 cup heavy cream
- 1/4 cup lemon juice
- 2 tsp capers
Preparation
- Slice or pound chicken breasts into thin strips, roughly 1/8″ thin.
- Bring water for pasta to a boil.
- Combine flour, salt, pepper.
- Dredge chicken pieces in seasoning and brown in olive oil over medium heat. ~4 minutes per side.
- Remove chicken from pan to rest. (Optionally dust with seasoning a second time.)
- Add pasta to boiling water.
- Scrape remnants in pan and add sauce ingredients. Bring to a simmer, 10 minutes.
- Return chicken slices to sauce and simmer until hot.
Serve over angel hair pasta.
Result
This one is a variation of the Kickin’ Split Pea Soup, using ham instead of sausage plus more spice.
Ingredients
- 1 lb dried peas
- 1 lb boneless honey ham
- 1/4 white onion
- 10-15 baby carrots
- 8 medium cloves garlic, peeled
- 1 Tbsp savory
- 1 Tbsp sage
- 1 tsp ground cayenne red pepper
- 1 1/2 tsp salt
- 1 tsp ground white pepper
Preparation
- Dice onion, carrots, and garlic.
- Cut ham into 1/2″ cubes.
- Rinse and sort through peas to make sure they are clean and free of rocks, etc.

- Bring 8 cups water just to a boil.
- Reduce heat to medium and add all ingredients.
- Simmer covered for 30 minutes, stirring occasionally.
Serve.
Result

There are very few “rants” that I go off on when it comes to programming because I generally believe that most programmers want to do the right thing and there are innumerable ways to approach any problem, so who am I to say better?
That said, there are a few hot-button issues for me when it comes to programming patterns, and I encountered one such situation again recently. To frame the topic, here’s what I encountered:
Some machines within our domains at work are centrally managed using Microsoft System Center products (more specifically here, System Center Configuration Manager) and overall the system works pretty well. The basic premise is to ensure (enforce, really) a certain level of software version/patch compliance and this is meant to be achieved by having SCCM push down a package which verifies local software and automatically launching patches and product installations. The problem comes when something goes wrong with these installations and because of poor (perhaps “junior developer”) implementation patterns, this process which is meant to make things better can be detrimental instead, to the point of even acting like a denial of service attack on our own managed resources!
So what are the problematic patterns here I stamp my fist on tables and rant about?
- Assuming success is the natural outcome
- Assuming any arbitrary failure can be recovered from
In this particular case, the patching solution was making things worse because it attempted to install a piece of software which was inappropriate for the environment, failing, and then retrying ad-infinitum. This infinite loop not only meant that the machines were not patched as intended (and actually got further and further behind in patching because the process never completed successfully), but also ate up most of the machines processor and I/O constantly trying to install a package which would never succeed!
This situation was particularly annoying because it clearly should have been caught in QC before ever impacting my machines and demonstrates some lazy error handling practices which assumed success and swallowed errors rather than recovering or bailing out.
The definition of insanity is doing the same thing over and over again and expecting different results. - Albert Einstein
Blindly Assuming Success
This is a pattern I see quite frequently in software. I pride myself on being an optimist, but there is optimism and then there is an unhealthy disconnection from reality. Mechanical and structural engineers working in the “real world” have to base their designs on known, proven tolerances, planning for failure and understanding the limits of their materials. They know that given the environment their design is supposed to operate in, they can account for the expected stresses plus some additional safety factor. Outside of this tolerance range is unpredictability, “out of warranty”: risk. I often see the exact opposite in software design: there is a blind faith that whatever is attempted will succeed. So I rant:
Assume Failure — and Verify Your Success!
Does this mean you must verify the outcome of every statement? Of course not — we must always balance the risk of failures against their likelihood of occurring, and incredibly basic operations have a very high likelihood of success but I’m always amazed at the assumption that resources are infinite and immediately available. “On my dev box I was always able to create file X, so why shouldn’t I be able to do so in production?” cries the Dev. You might be right, but let’s be certain, shall we? Just verify the operation you attempted after doing so — or better yet, verify that it should succeed before even attempting it. What is the worst that can happen by assuming failure? Typically, just a disappointing experience for the user because what they wanted to occur did not. On the other hand, by assuming success without verifying can (and has) lead to some catastrophic situations where not only does the program not do what the user desired, but much worse damage occurs as well.
Failure is Always an Option
Contrary to the famous quote of Gene Kranz during the Apollo 13 mission, in software failure is always an option. Your own code will never know enough about its own environment and context to be truly bulletproof — nor does it need to be. What it does need to explicitly accept, though, is that failures can happen: some we can expect, understand, and may even be able to gracefully recover from, and all others we cannot. It’s the second class of failures that seem to be downplayed — not that we don’t recognize they can happen, but rather that we should not even try to deal with them. Ever seen code like this?:
try {
   // Do something
}
catch (Exception ex) {
   // Recover from ex
}
This kind of thing drives me nuts: it attempts to recover, but without any chance of really doing so, because catching such a generic exception type leaves you open to ANYTHING going wrong — and I guarantee you cannot recover from every failure type 🙂 This is the most extreme case, but even in many cases where more specific exceptions are caught there is still not enough context to reliably recover automatically. So if you can’t really recover, why are you even catching an exception?! So final rant:
Catch only what you expect can fail and that you can recover from — or fail gracefully and quit.
OK — ’nuff said, I’ll get off my soapbox. Over-and-out.

